

Custom surfboard racks offer a smart solution for anyone tired of tangled boards and wasted space. Overlooked by many, a well-built rack can actually protect your gear and free up whole corners of your garage. Here is something most surfers miss. About 80 percent of surfboard damage happens during storage or transport, not on the water. So building your own rack at home is not just a project, it is the secret to keeping every session smooth and your boards looking brand new.
Table of Contents
- Step 1: Gather Your Materials And Tools
- Step 2: Choose The Right Location For Your Rack
- Step 3: Measure And Mark Board Dimensions
- Step 4: Assemble The Surfboard Rack Framework
- Step 5: Secure And Test The Stability Of Your Rack
Quick Summary
| Key Point | Explanation |
|---|---|
| 1. Gather essential tools and materials. | Ensure you have a tape measure, saw, drill, safety glasses, and suitable wood or metal for constructing your rack. |
| 2. Choose an ideal location for storage. | Opt for indoor spaces away from direct sunlight, humidity, and heat to protect your surfboards from damage. |
| 3. Measure and mark surfboard dimensions accurately. | Take precise measurements of board length and width to ensure the rack fits your specific collection without friction. |
| 4. Assemble the framework with precision. | Cut materials to exact measurements and ensure strong joints using wood screws for optimal stability and durability. |
| 5. Secure the rack to wall studs. | Mount the rack using heavy-duty bolts on wall studs, and conduct load testing to guarantee stability before storing surfboards. |
Step 1: Gather Your Materials and Tools
Building your own surfboard rack requires careful preparation and the right collection of materials and tools. Before diving into construction, understanding what you need will make the entire process smoother and more efficient. Success starts with thorough preparation.
For this project, you will need a comprehensive set of tools and materials that will transform your garage or workspace into a surfboard rack workshop. According to the Food and Agriculture Organization, having the right tools is crucial for any construction project.
Essential Tools You’ll Need:
- Tape measure
- Circular saw or handsaw
- Drill with various drill bits
- Level
- Pencil
- Sandpaper (medium and fine grit)
- Safety glasses
- Work gloves
The materials for your surfboard rack will depend on your specific design and personal preferences. Wooden racks offer durability and classic aesthetics, while metal options provide sleek, modern solutions. Typical materials include cedar, pine, or treated lumber, which resist moisture and provide excellent strength for supporting surfboards.
Before purchasing materials, measure your surfboards carefully. Different boards require different rack dimensions, so precision is key. Consider the length, width, and number of boards you want to store. A standard rack might accommodate 2-4 boards, but custom designs can expand this capacity.
Choosing high quality materials ensures your surfboard rack will last through many seasons of beach adventures. Waterproof wood sealants or marine-grade paints can extend the life of your rack, protecting it from humidity and saltwater exposure. Select materials that complement your workspace and match your surfing lifestyle.
Once you have gathered all tools and materials, create a clean, well-ventilated workspace with enough room to maneuver. Lay out your materials systematically and double-check that you have everything needed before beginning construction.
To help you prepare for building your surfboard rack, here is a summary of the essential tools and materials along with their primary purposes.
| Tool/Material | Purpose | Notes |
|---|---|---|
| Tape measure | Measure board/rack dimensions | Ensures accuracy |
| Circular saw or handsaw | Cut wood to required sizes | Choose based on preference |
| Drill with various drill bits | Make holes for screws and attachments | Essential for assembly |
| Level | Ensure horizontal/vertical accuracy | Prevents structural issues |
| Pencil | Mark measurements on wood/materials | Use for temporary markings |
| Sandpaper (medium/fine grit) | Smooth edges and surfaces | Improves finish, safety |
| Safety glasses | Protect eyes during cutting/drilling | Must-have for safety |
| Work gloves | Protect hands during construction | Prevents splinters/injury |
| Cedar, pine, or treated lumber | Main structure for rack | Moisture-resistant options |
| Waterproof sealants/paints | Protect rack from moisture/humidity | Increases rack lifespan |
Remember, building a surfboard rack is not just about functionality but also about creating a personalized storage solution that reflects your passion for surfing. Take your time, measure twice, and enjoy the process of crafting something uniquely yours.
Step 2: Choose the Right Location for Your Rack
Selecting the ideal location for your surfboard rack is more than just finding an empty wall space. According to University of California, Santa Barbara, strategic placement can significantly impact both functionality and board preservation.
Indoor vs Outdoor Considerations
Indoor locations offer the best protection for your surfboards. Look for areas that are dry, away from direct sunlight, and have minimal temperature fluctuations. Garages, mudrooms, and dedicated equipment spaces work perfectly. Avoid storing your rack near heating vents or in direct sunlight, which can damage surfboard materials over time.
If indoor space is limited, consider vertical storage solutions. Walls near entrance areas or hallways can transform unused vertical space into an efficient surfboard storage zone. Ensure the wall is sturdy enough to support the rack’s weight and your surfboards.
Environmental Protection Strategies
When choosing a location, consider environmental factors that might impact your surfboards. Areas with high humidity can cause wooden racks to warp and surfboards to develop mold. Opt for spaces with good air circulation and minimal moisture. A dehumidifier can help protect your equipment in particularly damp environments.
Measure the space carefully before installation. Your rack should provide enough clearance for boards to be lifted on and off without obstruction. Leave at least 12-18 inches of space around the rack for comfortable maneuvering.
Think about accessibility and convenience. The best surfboard rack location allows easy access before and after your surf sessions. Consider proximity to doors, gear storage, and your vehicle. A rack near your exit point makes grabbing your board and heading to the beach a seamless experience.
For quick reference, this table documents the key storage location factors you should consider to protect your surfboards and keep your rack accessible.
| Factor | Best Practice | Reason/Impact |
|---|---|---|
| Sunlight | Avoid direct exposure | Prevents UV damage to boards |
| Humidity | Choose dry, well-ventilated areas | Prevents mold, board & rack warp |
| Temperature | Avoid areas with major fluctuations or heat sources | Protects board materials |
| Accessibility | Place rack near gear storage or exit | Easy access before/after sessions |
| Wall strength | Mount on sturdy walls with studs | Ensures rack supports weight |
| Clearance | Leave 12–18 inches around rack | Allows easy board removal/storage |
| Security | Prefer visible, non-public, lockable locations | Reduces theft risk |
Security is another crucial factor. Choose a location visible to you but not easily accessible to potential thieves. If storing in a shared space like a garage or hallway, consider racks with locking mechanisms or positioning that requires passing through multiple security points.
Before final installation, do a test placement. Use painter’s tape to outline the rack’s dimensions on the wall. Walk around this virtual space, simulate board removal and replacement, and ensure the location feels natural and convenient.
Remember, the perfect surfboard rack location balances protection, accessibility, and your personal lifestyle. Take time to evaluate your space and choose wisely.
Step 3: Measure and Mark Board Dimensions
Precision is paramount when preparing to build your surfboard rack. According to MIT’s Center for Bits and Atoms, accurate measurements form the foundation of successful construction.
Preparing for Measurement
Begin by gathering your measurement tools. You will need a high-quality tape measure, a sharp pencil, and a straight edge or carpenter’s square. Clear your workspace and lay out each surfboard individually, ensuring you have ample room to maneuver.
Measure the length of each surfboard from nose to tail, taking care to keep the tape measure straight and taut. Surfboards can vary dramatically in length, ranging from short 5-foot performance boards to longer 10-foot longboards. Record each board’s precise length, understanding that your rack design must accommodate your specific collection.
Width measurements are equally critical. Measure the widest point of each board, typically located near the board’s center. This dimension will help you determine the spacing and support requirements for your rack. Some surfboards have unique shapes, so measure multiple points to ensure comprehensive understanding.
Creating Precise Markings
Using your carpenter’s square, create clean, straight marking lines on your chosen rack material. Accuracy here prevents structural complications later. Make light pencil marks that can be easily erased or covered, allowing flexibility during the building process.
Consider the thickness of your surfboards when planning rack spacing. Most surfboards range between 2-3 inches thick, but longboards and specialized boards might differ. Your rack should provide enough clearance to slide boards in and out without friction, yet maintain a snug, secure fit.
If you own multiple boards with varying dimensions, create a quick reference chart. List each board’s length, width, and thickness. This documentation becomes invaluable during rack construction, helping you design a versatile storage solution that adapts to your specific surfboard collection.

Verify your measurements multiple times before proceeding. The old carpenter’s adage “measure twice, cut once” holds particularly true when building specialized equipment like a surfboard rack. Small measurement errors can compromise the entire structure’s integrity and functionality.
Take photographs of your measurements and markings as a backup reference. These visual records can help you double-check dimensions and serve as a helpful guide during the construction phase. With precise measurements complete, you are now ready to move forward in creating a custom surfboard rack tailored to your exact needs.
Step 4: Assemble the Surfboard Rack Framework
With measurements completed, you are now ready to transform your design into a functional surfboard rack. According to University of California, Santa Barbara, strategic framework assembly is crucial for creating a reliable storage solution.
Structural Foundation Preparation
Begin by cutting your chosen materials to the precise dimensions you measured earlier. Wooden lumber works exceptionally well for this project, offering durability and flexibility. Cedar and pine are excellent choices, providing strength while remaining lightweight. If you want additional protection for your equipment, check out our heavy-duty wetsuit hanger for inspiration on material resilience.
Align your cut pieces carefully, ensuring each joint matches your original design. Dry fit the framework before permanent attachment, which allows you to make minor adjustments and confirm structural integrity. Use your carpenter’s square to guarantee perfect 90-degree angles, preventing future warping or instability.
When connecting framework pieces, wood screws provide superior holding power compared to nails. Pre-drill pilot holes to prevent wood splitting, a common mistake among DIY enthusiasts. Choose screws appropriate to your lumber thickness - typically 2-inch exterior grade screws work perfectly for most surfboard rack designs.
Reinforcement and Stability
Consider adding diagonal bracing to increase the rack’s overall stability. These supportive pieces distribute weight more evenly and prevent potential rack sagging under multiple surfboards. Position braces strategically, connecting them at key stress points to maximize structural strength.
If your design includes vertical supports, ensure they are perfectly plumb using a level. Slight misalignments can create significant balance issues when hanging surfboards. Take your time during this phase, as precision here determines the rack’s long-term performance and reliability.
Apply wood glue at connection points before screwing pieces together for additional strength. Wipe away excess glue immediately to maintain a clean, professional appearance. Allow sufficient drying time according to the manufacturer’s recommendations before testing the rack’s load-bearing capacity.
Once assembled, gently test the framework’s stability by applying slight pressure at different points. The rack should feel solid and immovable, with no unexpected wobbling or flex. Minor adjustments now can prevent potential failures later.
Remember, building a surfboard rack is about creating a personalized storage solution that protects your valuable equipment. Patience and attention to detail will result in a rack that not only looks great but serves its purpose perfectly.
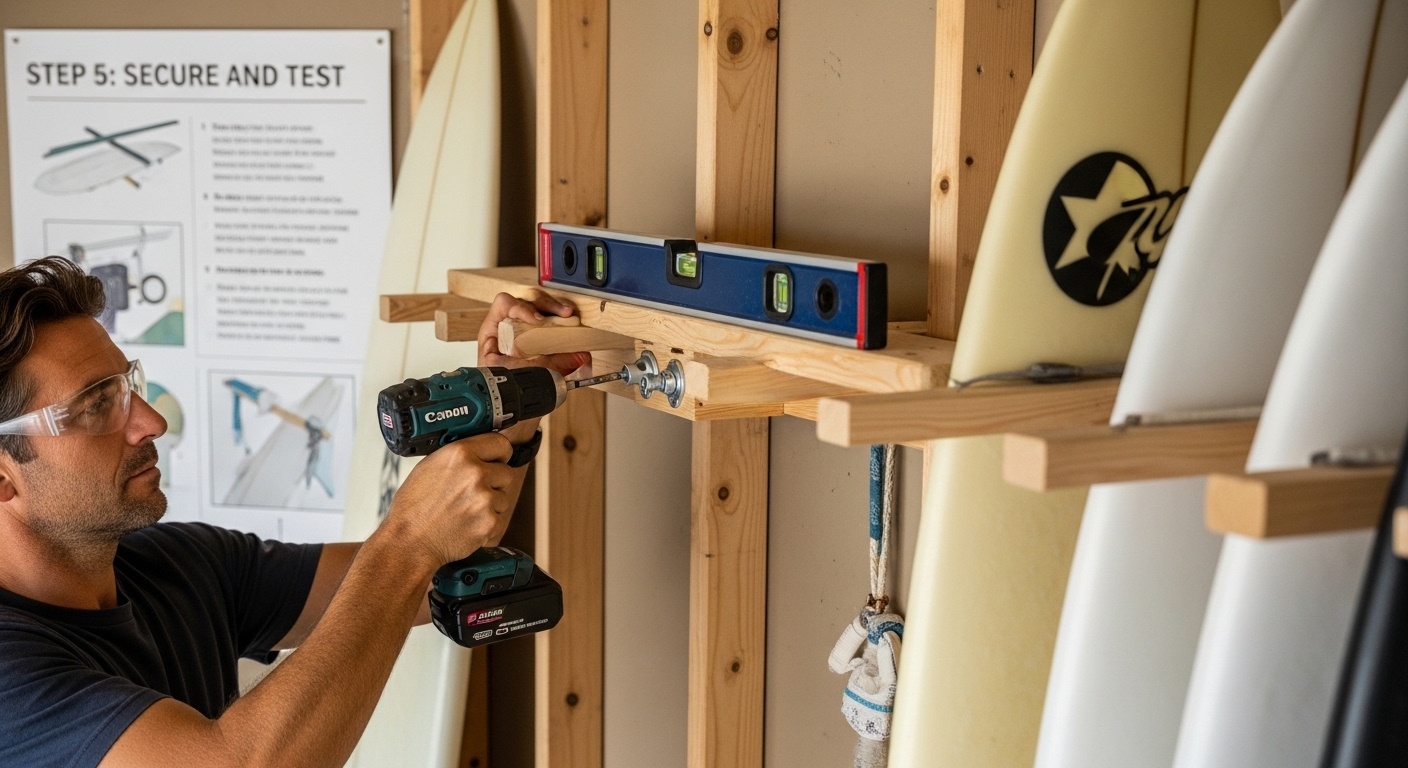
Step 5: Secure and Test the Stability of Your Rack
The final stage of surfboard rack construction demands meticulous attention to security and stability. According to the ECOBOARD Project, proper installation ensures both safety and longevity of your storage solution.
Wall Mounting Techniques
Securing your rack to the wall requires precision and the right hardware. Wall studs are your best anchor points, providing maximum support for heavy surfboards. Use a stud finder to locate these structural supports, marking them clearly with a pencil. Avoid drywall anchors alone, as they cannot bear the substantial weight of multiple surfboards.
Select heavy-duty lag bolts or specialized mounting hardware designed for significant loads. Stainless steel or galvanized mounting hardware resists corrosion, particularly important in humid or coastal environments. Pre-drill pilot holes slightly smaller than your bolt diameter to prevent wood splitting and ensure a tight, secure connection.
Apply a spirit level horizontally and vertically during mounting to guarantee your rack sits perfectly straight. Even minor misalignments can create uneven weight distribution, potentially compromising the entire structure’s stability. Take your time during this critical phase, double-checking measurements before final installation.
Load Testing and Safety Verification
Before placing your valuable surfboards on the new rack, conduct a comprehensive load test. Start by hanging weights equivalent to your heaviest boards, incrementally increasing the load to simulate real-world usage. This methodical approach helps identify potential structural weaknesses before risking your surfboards.
Inspect all connection points carefully. Look for any signs of stress, such as slight wood warping, loose screws, or micro-movements when weight is applied. A stable rack should feel solid and immovable, with no discernible flex or wobbling under load.
Consider applying a clear wood sealant or marine-grade paint to protect your rack from moisture and potential wood degradation. This extra layer of protection extends the rack’s lifespan and maintains its structural integrity, especially in environments with high humidity or temperature variations.
Document your rack’s specifications and weight capacity. Create a simple reference card noting maximum board weight, ideal positioning, and any specific maintenance recommendations. This documentation serves as a helpful guide for future use and potential rack modifications.
Remember, a well-constructed surfboard rack is more than just storage - it’s a testament to your craftsmanship and dedication to preserving your surfing equipment. Each careful measurement and secure mount represents your passion for the sport.
Take Your Surf Storage to the Next Level
Building your own surfboard rack is a smart way to organize your gear and protect your investment, but are you overlooking your wetsuit storage? Many surfers struggle with bulky, wet wetsuits cluttering their new racks or damaging delicate neoprene. Using a reliable solution is just as important for your wetsuit as for your boards. Check out our Wetsuit Hangers – Surf Vida for a heavy-duty, foldable hanger made to support even the heaviest soaked wetsuit while protecting its shape and helping it dry faster.

Don’t let all your hard work organizing stop at your surfboards. Give your wetsuit the care it deserves with our innovative tools made for surfers like you. Start exploring the best in surf storage solutions today at Surf Vida and see why passionate wave riders count on us for their gear. Store smarter and get ready for your next session—with peace of mind and total organization.
Frequently Asked Questions
What materials do I need to build a surfboard rack?
To build a surfboard rack, you will need tools such as a tape measure, circular saw, drill, level, and safety glasses. You’ll also need materials like wood (cedar, pine, or treated lumber) and waterproof wood sealants or marine-grade paints for durability.
How do I choose the best location for my surfboard rack?
Choose a location that is dry, away from direct sunlight, and has good air circulation. Indoor spaces like garages or mudrooms are ideal. Make sure the wall is sturdy enough to support the weight of your surfboards, and leave enough clearance for easy access.
What should I consider when measuring my surfboards for the rack?
When measuring, record the length, width, and thickness of each surfboard. Use a tape measure and ensure it is straight and taut. Create a reference chart for your boards to help design a rack that accommodates your entire collection.
How can I ensure my surfboard rack is stable and secure?
Secure your rack to wall studs using heavy-duty lag bolts or specialized mounting hardware. Pre-drill pilot holes to prevent splitting, and use a level to ensure it sits straight. Conduct a load test with weights equivalent to your heaviest boards to check stability.